The rest is interior. Nice CD player,
two 10 inch subs powered by a 700 watt amp in a ported box (built by
me).
The interior is black with arm rest delete.
Here is a picture of my new Trick Flow Track intake.
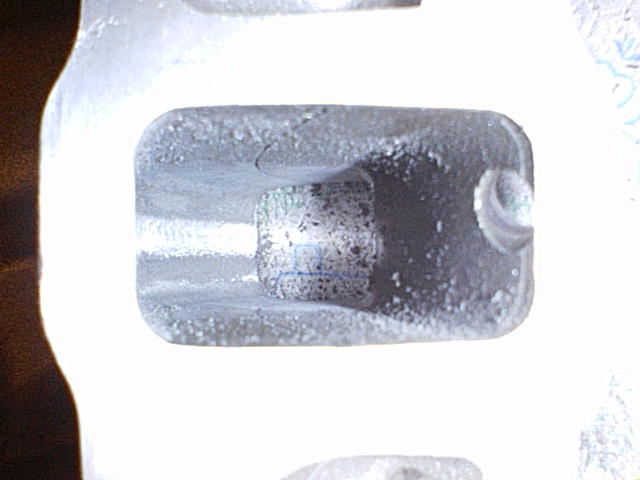
I swear to God, I'm going to DDT (wrestling move) the next person that
tells me that I should leave the ports "With rough edges, because it
promotes
atomization..." These people are the one's I can't stand. Yes, What
your
seeing is factory casting. The "flakes" that are standing up in the
port
are aluminum. That's the way they come new. It's my job to take 'em out!
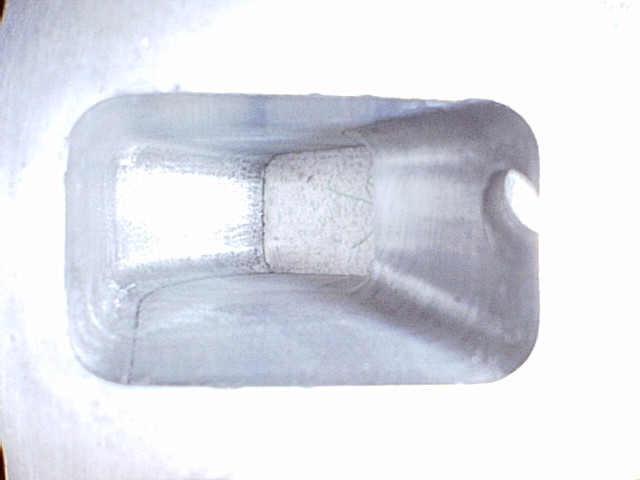
 Here is a pic of the finished product. You can't tell
me that the first pic will make more power than this. hehe.
Here is a pic of the finished product. You can't tell
me that the first pic will make more power than this. hehe.
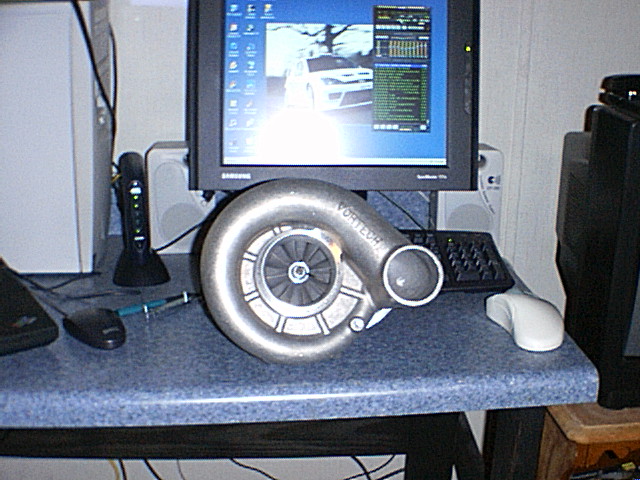
 The next pics are of my new Vortech Super Quiet S Trim
supercharger. I used to have an A trim. I sent it back to Vortech to
have it upgraded to an S trim but the Retard at Vortech told me that
the "dowel pegs don't line up anymore" and "you'll have to get a new
one". I know damn well that the A trim was in good condition! I took it
apart. The only thing wrong with it was it needed a front oil seal and
an upgrade to an S trim. So, needless to say, I ended up turning in my
old one for a 500 dollar credit toward a new one.
The next pics are of my new Vortech Super Quiet S Trim
supercharger. I used to have an A trim. I sent it back to Vortech to
have it upgraded to an S trim but the Retard at Vortech told me that
the "dowel pegs don't line up anymore" and "you'll have to get a new
one". I know damn well that the A trim was in good condition! I took it
apart. The only thing wrong with it was it needed a front oil seal and
an upgrade to an S trim. So, needless to say, I ended up turning in my
old one for a 500 dollar credit toward a new one.
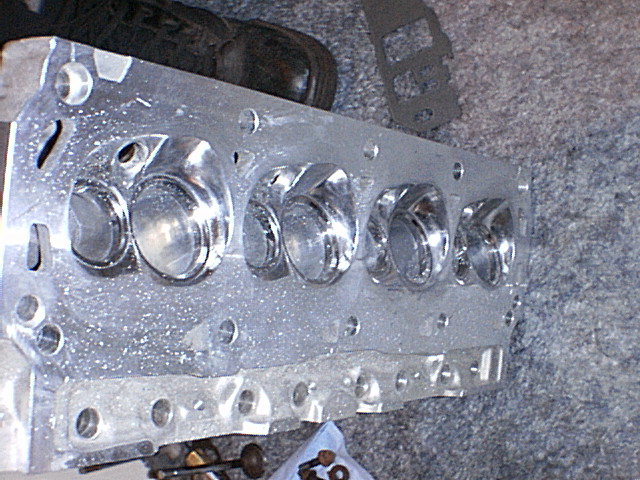
Next is my cylinder head.
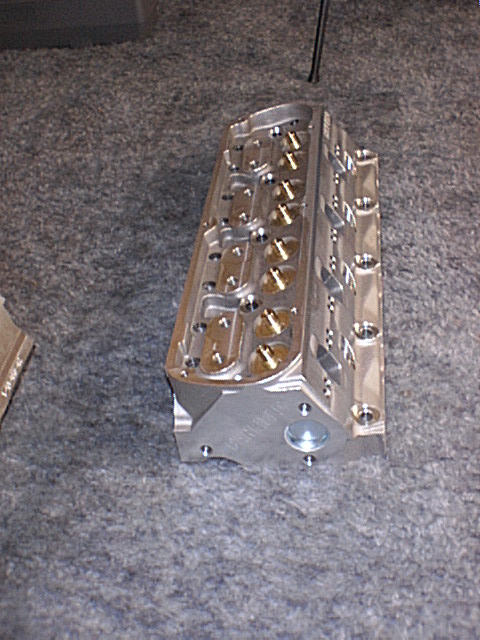
In this pic, I've completed the de-burring and have POLISHED the intake
runners, exhaust runners, and combustion chamber! My best work yet! I
used multiple sandpaper rolls on them. I started out with a De-burring
kit from Goodson. I used 120 grit to start, then went to a 320 grit
roll, then went to a red scotch brite pad slathered in Mothers Chrome
and Aluminum polish, and finished with Mothers and a buffing wheel on
my tiny dremel. I used
this method on both the runners and the combustion chambers. Everything
is like a mirror. There are no lips on the runners where the runner
meets
the valve seat. It's perfectly smooth. The tiny spots you see on the
top
of the head was a little left over mothers polish.
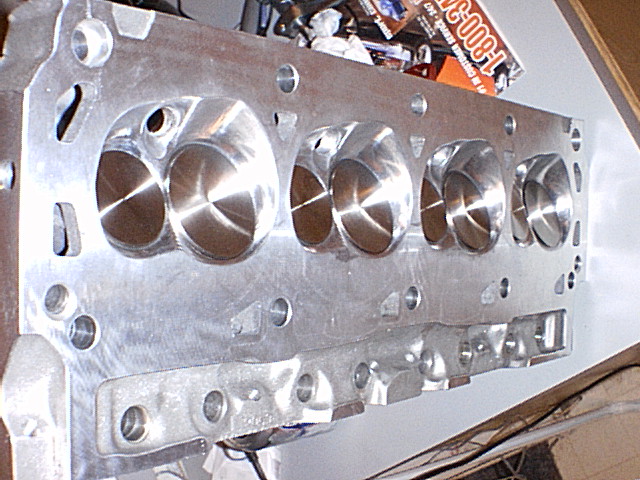
 I used Ferrera race valves with the "necked down"
section on the stem.
I used Ferrera race valves with the "necked down"
section on the stem.
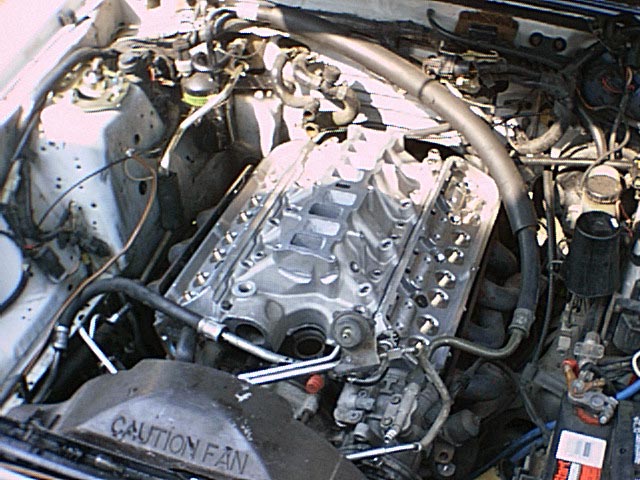
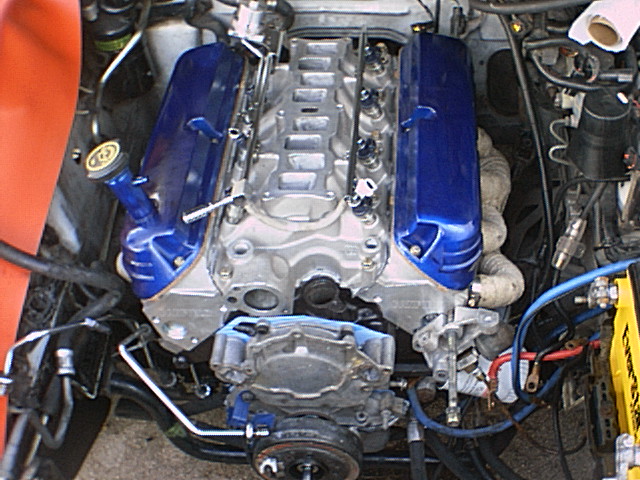
 Here's a test fit of the new heads and intake manifold.
My headers weren't wrapped yet when this pic was taken. I just wanted
to
get some inspiration to keep working on my car. This sight was enough
to
get some blood pumping!
Here's a test fit of the new heads and intake manifold.
My headers weren't wrapped yet when this pic was taken. I just wanted
to
get some inspiration to keep working on my car. This sight was enough
to
get some blood pumping!
7/6/03
I guess I'll just keep adding on to this page till it gets too long.
hehe.
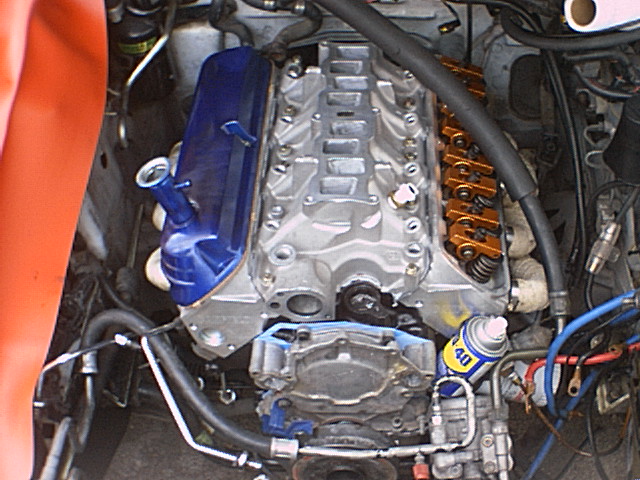
Here's the latest work on my 5.0 project! I put the heads on with a
Felpro 1011-1 Steel wire gasket. (non-lock ring type). I used a heavy
coat of Permatex Copper head gasket spray on both sides of
the gasket. ARP
head bolts are torqued to 75 lbs. I thought that was low, but the
instructions on the bolts said 70 lbs for aluminum heads. In the
picture, you can see
my Harland Sharp roller rockers mounted on 5/16 studs, custom 6.075
length
pushrods to get the roller tips right where they should be on the valve
stem,
tripple valve springs, Thermo Tech header wrap, and ATI Super Dampener.
Not too much longer and I'll be back on the road! Can't wait to drive
her again.
 Kirban billet fuel pressure regulator on the rail. Ford Motorsport
36
lb injectors.
Kirban billet fuel pressure regulator on the rail. Ford Motorsport
36
lb injectors.
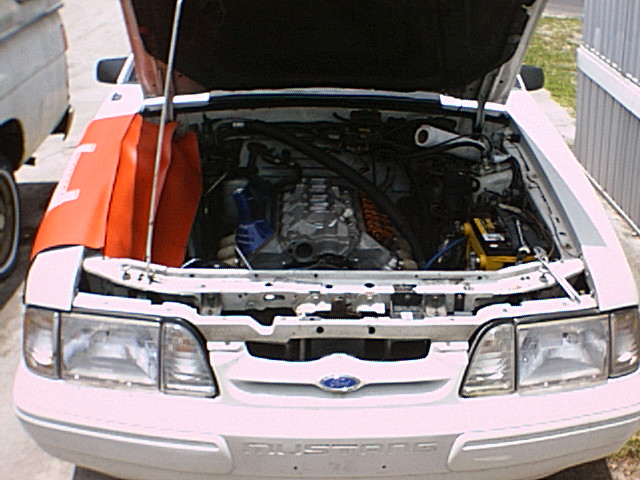
 Here is the last pic I took of my engine. For some reason, I
forgot about documenting the progress and focused my attention to
getting it to run right.
Here is the last pic I took of my engine. For some reason, I
forgot about documenting the progress and focused my attention to
getting it to run right.

After getting the supercharger all lined up it worked perfectly and put
out 6 to 9 psi. I took her to the track and ran 12.24 @ 113. I could've
broke into the 11's, but didn't have a 2 step to hold a good launch
rpm. I seemed to come out of the hole way too low dumping the clutch at
3500 rpm. But here's a few videos of the runs.
First run: First run down the track
Second run: Second
run down the track
I have since blew a head gasket when doing a 13 psi run (non
intercooled). I am totally fed up with this block. I will never own
another 302 in my life. I have bought a new 351 block and put good
internals in it. The new engine consists of the following:
357 ci Stock non-roller block
Eagle Forged Steel Crank Internally Balanced (stock stroke)
Probe 8.25:1 pistons
H beam rods
Aluminum Flywheel
King Cobra Clutch
Romac Balancer
Anderson B-31 cam
Canton oil pan
Super Victor carb style intake converted to EFI
Hybrid Inc. Intercooler 12 x 3 x 24
Canfield heads
Hydrolic race roller lifters
Harland Sharp roller rockers
I will be making a custom 3" X
pipe that goes into a MAC 3" exhaust. It should be a SICK ride! I'll
document this one a little better.
Stay Tuned, I just ordered all my parts and will be assembling it
shortly!